

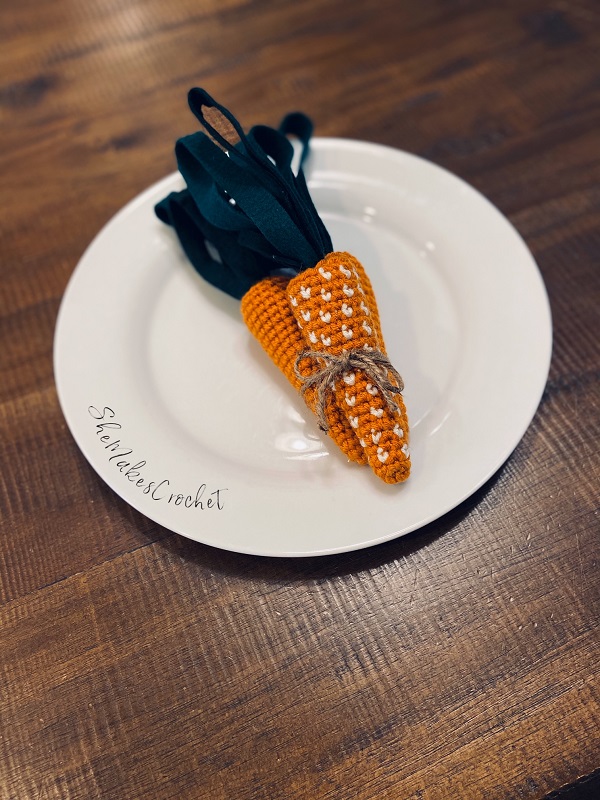
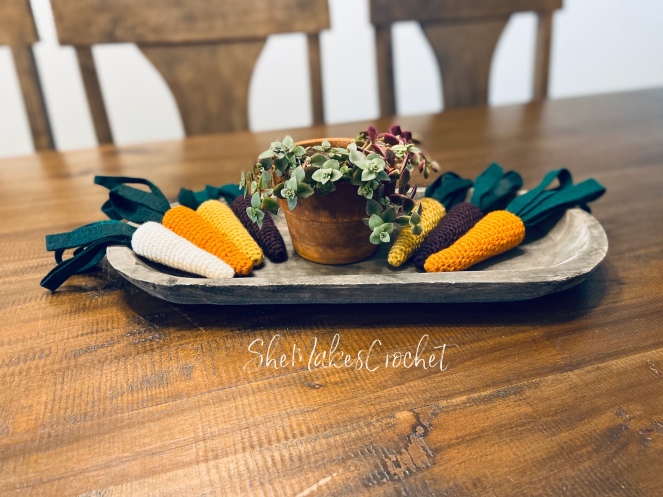
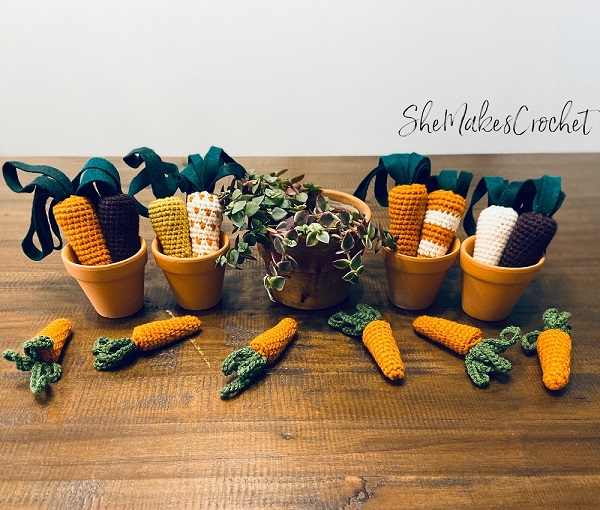
Who loves quick and versatile projects? I know I do! Well, if I’m being honest, I love most types of projects. If you are looking for something quick and versatile, whatever your preference, these carrots are just that! You can easily make them larger or smaller. I did crochet carrot tops and felt carrot tops – I love them both and they are both super simple. You could make them solid color or in cute patterns. You can make one or several. I think you get the point! I have so many ideas for these and I can’t wait to see how you use them. Here are just a few of my ideas:

This post will outline all the details you need to make your own beautiful carrots. I’ll also give you the information necessary to make the two different sizes I have pictured throughout – though, once you figure out the simple repeat, you can make these whatever size you like! At the end of the post I’ll layout the instructions for making the patterned versions I created, but the sky is the limit with these and I don’t think you can go wrong in working whatever pattern you can think up.
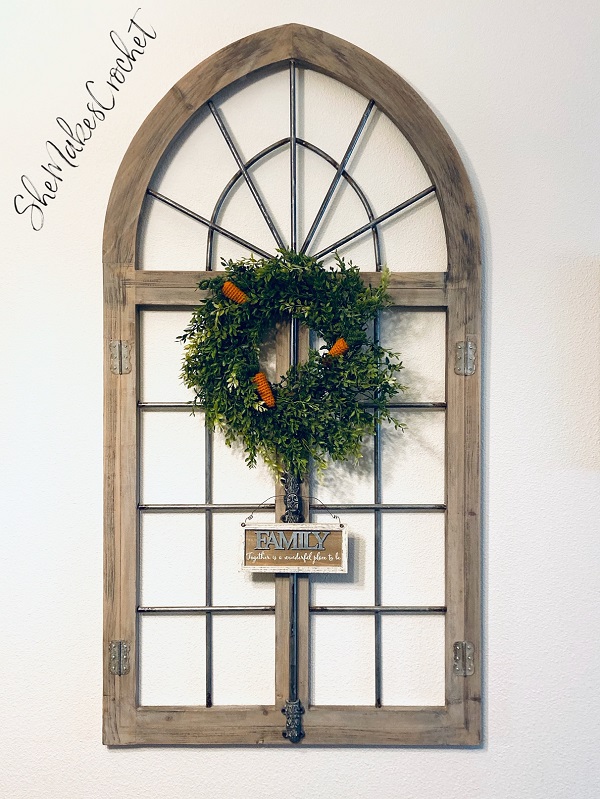
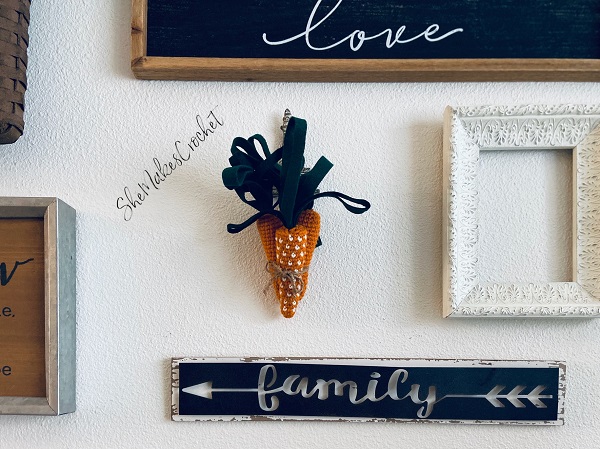
And in true *me* fashion – my creative energy is difficult to contain once I get started – I have a really cute way to use these along with another element that’s almost ready to be posted. So be sure to keep your eye out for that as well.
Carrot
Supplies:
- Worsted weight yarn – I used Yarn Bee Soft & Sleek
- Pumpkin Spice
- Mustard
- Plum
- Ivory
- Kale (if making crochet carrot tops)
- 3.75 mm crochet hook
- Scissors
- Needle for sewing down yarn tails
- Stitch marker (or scrap of yarn)
- Poly-fil or stuffing of choice
- Felt (if making felt carrot tops) – I used two different shades of green
- Glue – I used hot glue
Finished Dimensions: Are totally up to you! My small carrot is 2.5 inches and the large carrot is 4 inches, not including the greens.
Abbreviations and stiches used:
- CH chain
- SC single crochet
- INC increase (i.e. work 2 SC in the same stitch)
- DEC decrease (i.e. work one SC over two stitches)
- BLO back loop only
- SS slip stitch
Pattern Notes:
What’s really great about these carrots is that you can make them just about any size you like. I made two different sizes and I’ll indicate in the pattern the point in which I stopped if you would like to make the same sizes as me. By all means, if you wish to make these bigger or smaller, please do!
If you like the patterns I did for some of my carrots, you can find the details for those at the end.

Pattern:
Using carrot color
- Round 1: Magic ring and SC 6. Pull ring tight. (6 SC)
- Round 2: *INC, SC in next two. Repeat from * one time. (8 SC)
- Rounds 3-4: SC all around. (8 SC)
- Round 5: *INC, SC in next three. Repeat from * one time. (10 SC)
- Rounds 6-7: SC all around. (10 SC)
Note: Do you see the pattern? If you do, go right ahead and mindlessly carry on until your carrot is a size you like. Then, jump down to “Final Round”.
- Round 8: *INC, SC in next four. Repeat from * one time. (12 SC)
- Rounds 9-10: SC all around. (12 SC)
- Round 11: *INC, SC in next five. Repeat from * one time. (14 SC)
- Rounds 12-13: SC all around. (14 SC)
Note: This is where I stopped for my smaller carrot. If you are satisfied, skip down to “Final Round”. If you’d like to make the larger size, continue.
- Round 14: *INC, SC in next six. Repeat from * one time. (16 SC)
- Rounds 15-16: SC all around. (16 SC)
- Round 17: *INC, SC in next seven. Repeat from * one time. (18 SC)
- Rounds 18-19: SC all around. (18 SC)
- Round 20: *INC, SC in next eight. Repeat from * one time. (20 SC)
- Rounds 21-22: SC all around. (20 SC)
Note: This is where I stopped for my larger size. You could definitely keep going several more rounds if you want an even bigger carrot.
Final Round:
Note: This round is worked in the back loop only.
Work a DEC in the BLO and repeat until the end of the round. Hint: You will end with half the number of stitches you started with. For the small carrot (final stitch count 14), you will work a DEC in the BLO seven times around, ending the round with 7 stitches. For the large carrot (final stitch count 20), you will work a DEC in the BLO ten times around, ending the round with 10 stitches.
Fasten off and leave a long tail.
Carrot Greens:
Note: I crocheted the greens for my small carrots and used felt for the large ones. If you choose to flip things around (in other words, crochet tops for the large carrots and/or use felt for the small ones), you’ll need longer chains and/or shorter strips of felt. This is a very forgiving project!
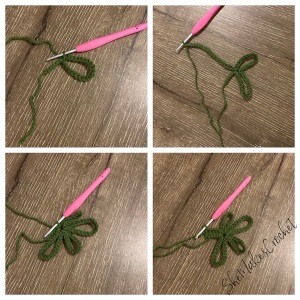
Crochet Carrot Greens
- Part 1: CH 6 (optional, mark this stitch)
- Part 2: (continue to) CH a length at random. For my (small) carrots, I chained random lengths between 14-28 CHs long. Join with a SS into the sixth CH from the starting slip knot! Hint: The marked stitch, if you marked it.
- Part 3: CH a length at random. SS into the sixth CH from the starting slip knot. Hint: This is the same stitch you joined into previously.
- Repeat Part 3 two or three more times. Seriously, keep being random with this because I think it makes the carrots more natural.
- Part 4: DC into the fifth CH from the starting slip knot and into the remaining four CHs creating the “stem” referenced in the picture above. Fasten off.

Felt Carrot Greens
- Cut thin strips of felt. For my (large) carrots, I used strips approximately 12 inches long. I eyeballed this – no measuring and no need for drawing lines! I think the carrots look more natural with variation to them so just pull out your scissors and get cutting. I used two different shades of green, you could do more or less. You could also vary the length of your strips if you have a large enough sheet of felt.
- I used 4-5 strips of felt per carrot.

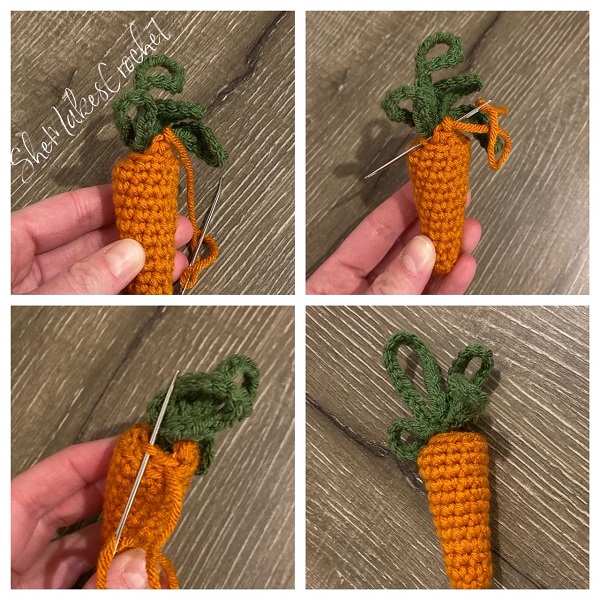
These pictures illustrate stuffing the ends of the felt top and the “stem” end of the crochet top into the carrot (after applying glue to the inside). Then, they illustrate weaving the carrot yarn tail through the front loops of the last round of stitches. Note: The needle alternates working from bottom to top, then top to bottom and so on all the way around. Once you reach the end, pull the yarn tail tight and the top of the carrot closes up around the greens.
Attaching the Greens:
- Firmly stuff your carrot, leaving about a half inch or so without stuffing.
- Crochet top: Working quickly (and carefully), apply glue inside the top of the carrot. Stuff the thick “stem” end i.e. the 5 DC section of the carrot green into the top of the carrot.
- Felt top: Grab 4-5 strips of felt and fold in half. Working quickly (and carefully), apply some glue inside the top of carrot and stuff the ends of the felt into the top of the carrot. I also added a small amount of poly-fill after this.
- Then, for both types of greens, weave the carrot yarn tail through the front loops of the last round of stitches. When you return to the start, pull the tail tightly in order to close off the top. Weave in any tails.
Pattern Variation Ideas:
I made a striped carrot and two variations on polka-dots. For the striped carrot, work the first four rounds in orange. Then, switch to white for the next three rounds, followed by orange for three rounds, then back to white and so on.
For the white carrot with orange dots, work the first three rounds in white. Then, work one round alternating orange and white every other stitch – not as tedious as it sounds! Next, work two rounds of white, followed by another round of alternating orange and white every other stitch. Then, two rounds of white and so on.
For the final pattern variant, the orange carrot with white dots, work the first two rounds in orange. Then, work one round alternating orange and white every other stitch. Next, work one round of orange, followed by another round of alternating orange and white every other stitch. Then, one round of orange and so on.
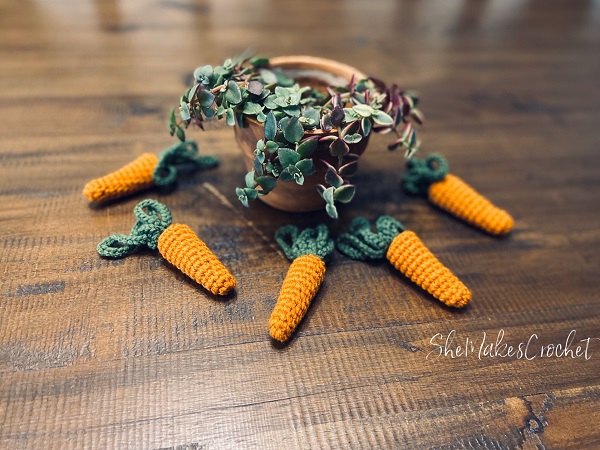
That’s it! Aren’t these so simple!? As I mentioned at the start of this post, I am finishing up something cute that can be totally separate from these carrots. It also will look adorable with them. I’ll get that up soon! I think these carrots are too cute and I would love to see how you decide to use yours.

I love when people share their finished pieces. If you share your piece on facebook or instagram, please tag me so I can see it @shemakescrochet.
You are free to share your finished work, to include selling your finished products, but please credit me – SheMakesCrochet – as the pattern designer. Please do not distribute this pattern or any portion of it, instead direct people to my blog. THANK YOU!


Nice blog thanks ffor posting
Thank you!