Has it really been three months since my last rag doll pattern!? It doesn’t feel that long because I’ve had these on my mind quite often. I have so many ideas and I still haven’t forgotten all of your wonderful suggestions for future animals. Once I get an idea in my mind though, I have to run at it full force or I’ll never be able to concentrate on anything else. Which is a great way to be until I get distracted by another creative endeavor.
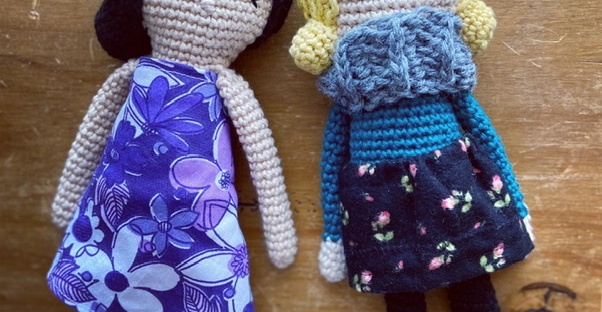
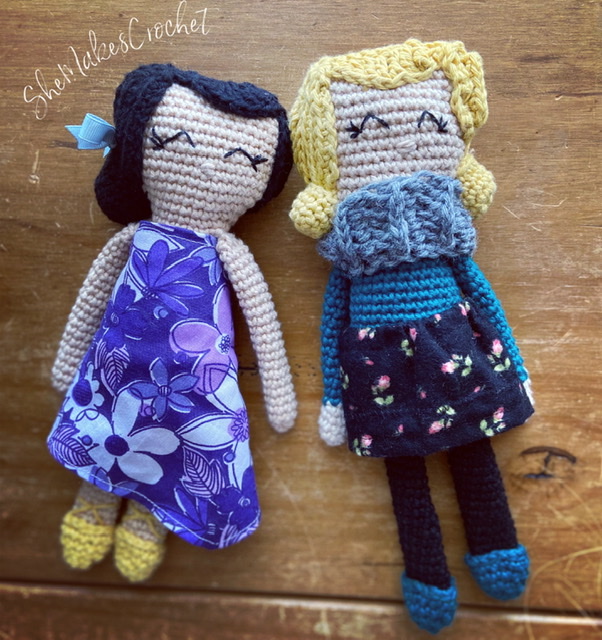
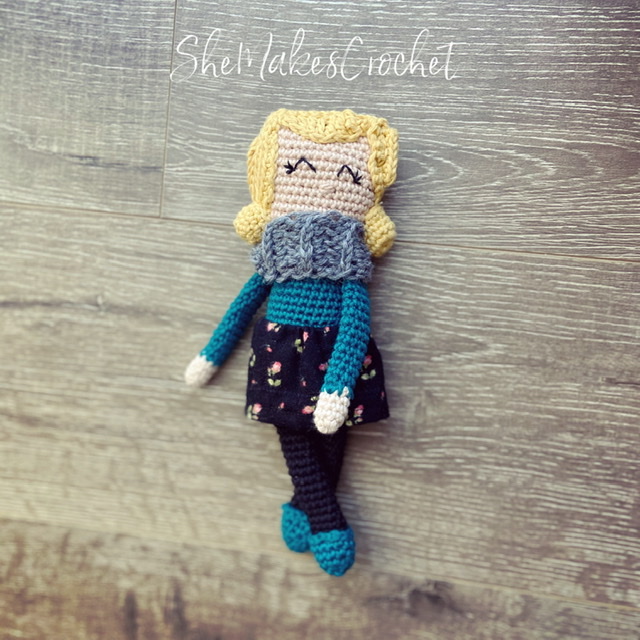
This project started making her way into my mind a while ago, but it wasn’t until I was finishing up my Felix Blanket that I began to have more clear visions and suddenly it was time to bring her to life. I knew I wanted to keep my traditional flat, minimally stuffed and no-sew body construction with this design. I also wanted her to be a simple shape, some sort of an up-do for her hair, really colorful and super feminine. I had some pretty yarn leftover from another project and knew it was time for it!
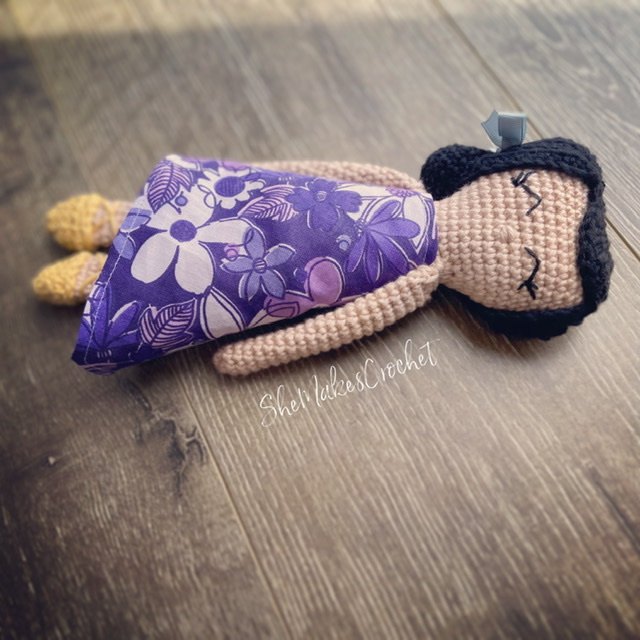
If you find yourself enjoying this style of doll, I have a bunny, bear, fox, squirrel and deer pattern made with similar methods.

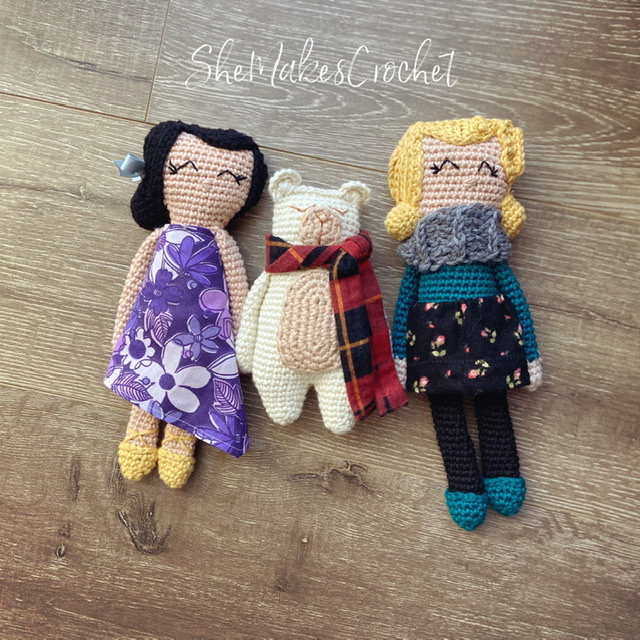
Don’t they look adorable with their animal friends!?
Rag Doll
Supplies:
- Worsted weight yarn for the body, hair, clothing – I used Dishie cotton
- Contrasting yarn for the scarf – I used Wool of the Andes
- 3.5 mm crochet hook
- 4.5 mm crochet hook (for the shoes)
- 5.5 mm crochet hook (for the scarf)
- Scissors
- Needle for sewing down yarn tails
- Stitch marker (or scrap of yarn) – optional
- Poly-fil or stuffing of choice
- Embroidery Floss
- Needle for embroidery details
- Optional scrap of fabric, needle, sewing thread and elastic for the dress and/or skirt
Finished Dimensions: My dolls are approximately 10 inches tall.
Abbreviations and stiches used:
- CH chain
- SC single crochet
- HDC half double crochet
- DC double crochet
- TR treble crochet
- INC increase (i.e. work 2 SC in the same stitch)
- DEC ***decrease (i.e. work 1 SC over two stitches)***
- FLO front loop only
- BLO back loop only
***Please note, with amigurumi, I recommend making an invisible decrease. See pattern notes if you are unsure of the difference.***
Pattern Notes:
These dolls are created working in continuous rounds. The limbs are closed off before attaching. See the Closing Off instructions below as the pattern will direct you to them later.
Closing Off

In essence, you will squish the tube flat. There will be 1 unworked stitch on either end and then you will work a SC through stitches on both sides of the tube converting the tube into a single row of stitches.
Image 1: depicts the tube of 10 stitches.
Image 2: the needle is serving as a place holder for the skipped stitch. You will insert your hook into the first stitch after the needle AND into the last stitch you just created to work your first SC.
Image 3: shows what your limb will look like after making that first SC through both layers of the tube and the needle highlights the two stitches you will insert your hook into to work the next SC.
Image 4: further clarifies the 4 SC stitches you will complete and as you can see, after you work the blue, purple and pink stitches, there will be 1 stitch left unworked on the end.
The limbs are attached as you go along making the base for these dolls no sew! The method for attaching limbs is described below and the pattern will direct you here later.
Attaching Arms

Image 1: shows how you will pick up the arm to work the next four stitches of the body and the 4 stitches of the arm simultaneously to attach.
Image 2: illustrates inserting your hook through the BLO of the first stitch of the arm and the FLO of the next stitch of the body.
Image 3: depicts what it looks like after making the first stitch to attach the arm.
Image 4: shows where you will work the remaining three stitches, again through the BLO of the arm and FLO of the body in order to finish attaching the arm.
Finally, the invisible decrease is recommended as it’s usually neater with this style of crochet. Briefly, insert your hook into the FLO of the next stitch, DO NOT draw up a loop and instead, insert your hook into the FLO of the next stitch after that. It’s a little awkward at first, but you’ll get use to it. Then, yarn over and pull through two loops (i.e. the two front loops) and then yarn over and pull through to complete the stitch.
Changing Colors
If you choose to work clothing onto your doll as you create her, you will need to change colors throughout the pattern. When working in continuous rounds, this leaves a jagged line. To minimize this, I end my row (prior to the color change) with several slip stitches i.e. the last 4 or so SC stitches get converted into SS. Then, change colors on the last SS and work the next round in the new color. When I arrive back around at the slip stitches, I insert my hook into the previous row of SC stitches, not into the slip stitches. This is a quick method that will help to greatly disguise the jagged look by smoothing out the transition to the new color. It is completely optional!

Pattern:
Crochet the arms
Use the 3.5 mm hook throughout unless otherwise specified.
Using the body color work the arms.
- Round 1: Magic ring and SC 6. Pull ring tight. (6 SC)
- Round 2: *INC, SC in next two. Repeat from * one time. (8 SC)
Rounds 3-21: SC all around. (8 SC) - Round 22: Close off the arm by working 3 SC – see Closing Off instructions in pattern notes above if unsure.
- Break the yarn and complete a second arm. Place both arms aside for now.
Note: If you’d like to construct your doll with clothes in one step, change colors as needed to create your desired effect. In my example doll, I worked the first 5 rounds using the skin color and the remaining rounds in my shirt color.
Crochet the legs
Continue with the body color.
- Round 1: Magic ring and SC 6. Pull ring tight. (6 SC)
- Round 2: *INC, SC in next two. Repeat from * one time. (8 SC)
- Round 3: *INC, SC in next three. Repeat from * one time. (10 SC)
- Rounds 4-20: SC all around. (10 SC)
- Round 21: Close off the leg by working 4 SC – see Closing Off instructions in pattern notes above if unsure.
- Break the yarn and complete a second leg. DO NOT fasten off after the second leg. Instead, continue on to the body below.
Note: In my example doll, I worked the entire foot/leg using black for closed-toe leggings.
Continue on to the body
Now we will attach the legs and start working the body.
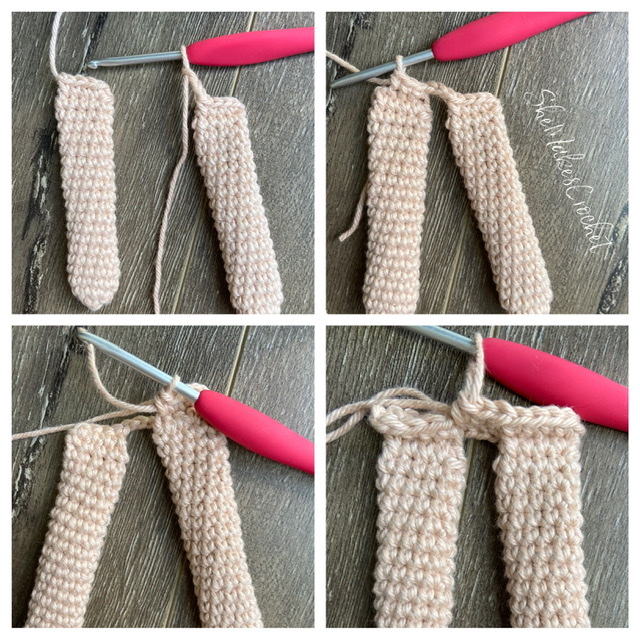
Image 1: shows the CH 3 at the start of the round.
Image 2: depicts how you then start working into the FLO for the second leg.
Image 3: illustrates after turning your work you will continue working around the leg and across the CH 3
Image 4: the end of the round. The legs are joined and the body is set up to be worked in rounds.
- Round 1: CH 3 and pick up the second leg. Working into the FLO, SC in the first 3 stitches of the second leg, INC in last. Rotate your work to continue working into the BLO which are now facing to the front and INC into the first stitch (i.e. the same stitch), SC in the last 3 stitches of second leg, SC in FLO of each of the CH 3, SC in the the FLO of the first 3 stitches of the first leg and INC in the last. Rotate your work to continue working into the BLO which are now facing to the front and INC in the first stitch (i.e. the same stitch), SC in the last 3 stitches of the first leg and finally SC in each of the remaining loops of the CH 3. (26 SC)
It may be helpful (or not) to mark the first stitch of each round as we will be working in continuous rounds.
Note: If making clothing, I took the waist up until Round 8 and changed to the shirt color starting on Round 9.
- Round 2: SC 4, INC, INC, SC 11, INC, INC, SC 7. (30 SC)
- Rounds 3-9: SC all around. (30 SC)
- Round 10: SC 6, DEC, SC 13, DEC, SC 7. (28 SC)
- Round 11: SC all around. (28 SC)
- Round 12: SC 6, DEC, SC 12, DEC, SC 6. (26 SC)
- Round 13: SC all around. (26 SC)
- Round 14: SC 6, DEC, SC 11, DEC, SC 5. (24 SC)
- Round 15: SC all around. (24 SC)
- Round 16: SC 6, DEC, SC 10, DEC, SC 4. (22 SC)
- Round 17: SC 5, DEC, DEC, SC 7, DEC, DEC, SC 2. (18 SC)
Note: We will attach the arms over the next TWO rounds.
- Rounds 18-19: SC 13. Attach the first arm over the next three stitches by working through the BLO of the next stitch of the arm and the FLO of the next stitch of the body – see Patterns Notes if unsure. SC 7. Attach the second arm over the next three stitches by working through the BLO of the next stitch of the arm and the FLO of the next stitch of the body. SC 10. (18 SC)
Note: If making clothes/shirt, I switched back to the skin color at the end of Round 17.
Continue on to the head
- Round 20: SC 6, INC, INC, SC 6, INC, INC, SC 2. (22 SC)
- Round 21: SC 7, INC, INC, SC 8, INC, INC, SC 3. (26 SC)
- Round 22: SC 8, INC, INC, SC 11, INC, INC, SC 3. (30 SC)
- Rounds 23: SC 9, INC, INC, SC 13, INC, INC, SC 4. (34 SC)
- Rounds 24-32: SC all around. (34 SC)
- Round 33: SC 10, DEC, DEC, SC 13, DEC, DEC, SC 3. (30 SC)
- Round 34: SC 26, skip the next stitch and close off by working 14 SC – see Closing Off instructions in pattern notes above if unsure.
Add the Details:
This is always my favorite part about making dolls! All of these features are optional and can be modified based on your ability, craft supplies and preference.
Crochet the hair
I really wanted these dolls to have crochet hair as opposed to loose strands, but they definitely would be cute that way if that’s your preference! To achieve my look, I made a circular shape and then did a series of SC strands to help define the hairline. Finally, I made a little tube shape for the ponytail and stitched it into place.

Images 2-4: depict working the first of three strands of hair. These first “right side” strands are made by chaining a length and then slip stitching at the top of the hair cap. Next, work single crochet stitches back down the chain and slip stitch into the next available stitch at the bottom of the hair cap.
Note: Rounds 1-5 are HDC stitches and as such, the abbreviation INC means to work two HDC stitches into the same stitch (instead of the usual SC stitches).
- Round 1: Magic ring and work 8 HDC. Join to first stitch. CH 1 (doesn’t count as a stitch throughout) turn. Pull ring tight. (8 HDC)
- Round 2: INC in each stitch. Join, CH 1, turn. (16 HDC)
- Round 3: *INC, HDC in next. Repeat from * until the end. Join, CH 1, turn. (24 HDC)
- Round 4: *INC, HDC in next two. Repeat from * until the end. Join, CH 1, turn. (32 HDC)
Note: This next round is an incomplete round.
- Row 5: *INC, HDC in next three. Repeat from * 6 more times. CH 1, turn. (35 worked HDC)
- Row 6: SC 6, HDC 3, DC 4, HDC, SC 7, HDC, DC 4, HDC 3, SC 6. CH 1, turn. (35 stitches)
Note: From here we will work the hair line and make some loose strands of hair along the sides. Please feel free to place your hair on your doll and make adjustments accordingly. You may choose to change strand lengths by making longer or shorter chains. You could change the number of strands by making more or less chains. You could also change the height of the stitches to get the hair to suit your preferences!
Right Side Strands (the doll’s right side)
- CH 13 and SS at the top of the hair cap. Turn and work 13 SC stitches down the CH. SS into the next stitch along the bottom. Note: the exact placement for the SS at the top is really up to you and I hope you can imagine how that particular placement would alter her look. I placed mine at the HDC immediately after the 7 SC.
- CH 9 and SS at the top of the hair cap. (I worked into the stitch next to my first strand.) Turn and work 9 SC stitches down the CH. SS into the next stitch along the bottom.
- CH 6 and SS at the top of the hair cap. (Again, I worked into the next stitch.) Turn and work 6 SC stitches down the CH. SS into the next stitch along the bottom.
- Fasten off leaving a long tail for sewing.
Top of the Hair Line
Attach yarn into the next available stitch along the top edge of the hair cap just adjacent to the right side strands created above. See image 2 below for further clarification. CH 1 and SC into the same space. Then, HDC, DC 2, TR, three TR into the next stitch, Skip the next stitch and SS. Note: This is another place you could change up the stitches a little if you wanted a different hair line.
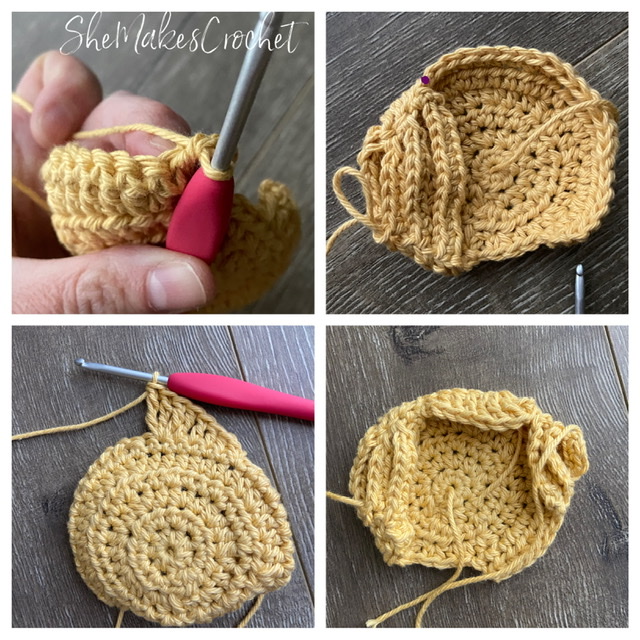
Image 2: shows what my hair cap looks like after making all three of the right side strands. The purple dot is the placement to start the top hairline.
Image 3: shows working the top of the hair line.
Image 4: the completed hair cap.
Left Side Strands
- CH 9 and SS at the bottom of the hair cap. See Note below. Turn and work 9 SC stitches up the CH. SS into the next stitch along the top.
- CH 7 and SS at the bottom of the hair cap. Turn and work 7 SC stitches up the CH. SS into the next stitch along the top.
- CH 5 and SS at the bottom of the hair cap. Turn and work 5 SC stitches up the CH. SS into the next stitch along the top. Fasten off leaving a long tail for sewing.
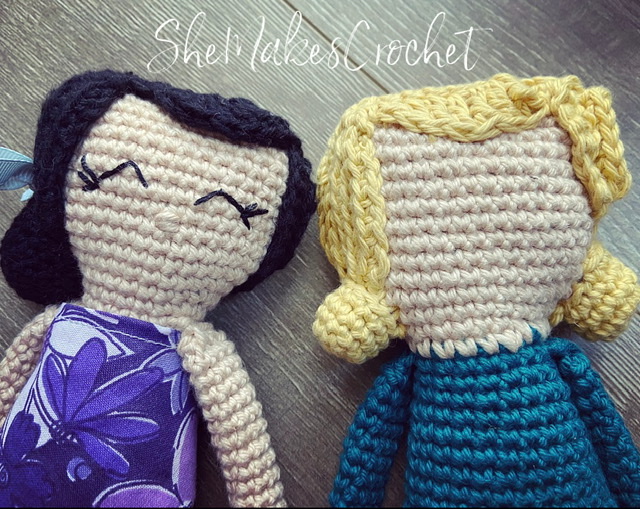
Note: Where you SS at the bottom of the cap is up to you. I slip stitched up higher onto the side for my yellow hair cap – approximately at the HDC immediately adjacent to the 6 SC at the start of the row. For the black hair cap, I stretched the strands more, slip stitching further down into the first couple SC stitches at the start of the row. You can see the difference that made by looking at my dolls.
Position the hair cap on the doll. You may have to slightly stretch and pin into place. You may also bunch up or fan out the strands you created on the sides. After you are satisfied, use the long tails to stitch into place. Note: I only lightly tack down the strands on the sides and more heavily stitch down the circular cap.
Ponytail
For my dark haired doll, I created one thick ponytail by:
- Round 1: Magic ring and work 6 SC. Pull ring tight. (6 SC)
- Round 2: INC in each stitch. (12 SC)
- Round 3: *INC, SC in next. Repeat from * until the end. (18 SC)
- Rounds 4-7: SC all around. (18 SC). Fasten off leaving a long tail. Very lightly stiff and stitch into place.
For my light haired doll, I created two smaller ponytails by:
- Round 1: Magic ring and work 6 SC. Pull ring tight. (6 SC)
- Round 2: INC in each stitch. (12 SC)
- Rounds 3-5: SC all around. (12 SC). Fasten off leaving a long tail, make 2. Very lightly stuff your ponytails and stitch into place.
Add a Face
Use embroidery floss and a sharp needle to stitch eyes. I also used a small strand of skin colored yarn to stitch a simple nose. See the video below for a complete walk through of making the face.
Shoes
Using a 4.5 mm hook
- Round 1: Magic ring and SC 6. Pull ring tight. (6 SC)
- Round 2: *INC, SC in next two. Repeat from * one time. (8 SC)
- Round 3: *INC, SC in next three. Repeat from * one time. (10 SC)
- Round 4: *INC, SC in next four. Repeat from * one time. (12 SC)
- Round 5: SC all around. (12 SC)
- Round 6: SS all around – keep these stitches loose! (12 SS) Fasten off leaving a long tail, make 2.
Squish her feet into the shoes and make a couple of small stitches to secure into place. For my dark haired doll, I used the yarn tail to create strappy shoes around the ankle after tacking them into place on her feet.
Panties
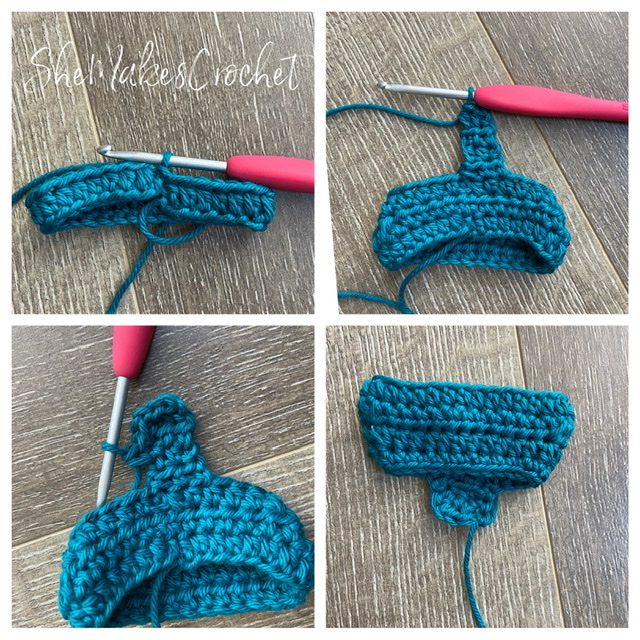
Image 2: working short rows.
Image 3: I’ve worked 3 SC stitches down the side of the short row. I will skip the last space and make my next SC into the next availabe space on Row 3.
Image 4: I need to fold the flap up to the back and stitch into place.
- Row 1: CH 31 and work a HDC into the second CH from hook and into each remaining CH. SS to join into first HDC. CH 1 (doesn’t count as a stitch throughout) and turn. (30 HDC)
- Round 2: HDC 6, DEC (by working a HDC decrease here and throughout), DEC, HDC 11, DEC, DEC, HDC 5. Join, CH 1 and turn. (26 HDC)
- Row 3: HDC 5, DEC, HDC 11, DEC, HDC 6. Join, CH 1 and turn. (24 HDC)
- Row 4: HDC 2, CH 1 and turn. (2 HDC)
- Rows 5-6: Repeat Row 4
- Row 7: HDC 2, CH 1 and rotate work to make SC stitches down the short rows you just created. I worked only 3 stitches and skipped the last space to achieve more of a round shape. Continue working SC stitches along the stitches of Row 3 and then back up the other side of the short rows. Again, I skipped the first space and only made 3 stitches back up the short rows.
- Fasten off leaving a long tail. Use the tail to stitch the short flap to the back side of the panties.
Scarf
Using 5.5 mm hook
- Row 1: CH 7 and work a HDC in the second CH from hook and into each remaining CH. CH 1 and turn. (6 HDC)
- Row 2: Work 6 HDC into the third loop. CH 1 and turn. (6 HDC)
- Rows 3-14: Repeat Row 2.
- Fasten off leaving a long tail. Stitch the two ends together to make an infinity style scarf.
Sew Clothing
I need to add my usual disclaimer that this is a crochet blog and my sewing skills are what I consider to be an advanced beginner. With that, my methods may be unconventional so please do what you know is best! Here is roughly what I did to complete the dress and the skirt. I used a sewing machine, but these items are so tiny, you could certainly stitch them by hand!
Dress
I wanted to do an asymmetrical bottom on my dress to compliment the side pony tail and I ended up cutting my pattern backwards (I left it that way on my doll) – so pay attention to that if you want your dress to slant a particular direction. I did something new for me and just took a piece of paper and created a paper dress that I liked and then drew a pattern for it. I attached it below if you want to use it.

After cutting my fabric, I roughly hemmed all edges. Then I sewed the back closed. I left a portion of the top open so it would have some stretch to make donning and doffing easier. I have it folded open in the picture above, but it lays closed nicely and you don’t even notice it.
Skirt
The skirt is definitely easier! I cut a small rectangle of fabric that was roughly 8.5 inches wide and 3.5 inches tall. I also cut a piece of elastic cord approximately 5.5 inches long.

I folded over the top and stitched it in place leaving it open on the sides. Then I threaded the elastic cord through that top hem. Fold the skirt in half with the right sides facing the inside and stitch the skirt closed, being sure to secure the elastic at this point as well. Fold up the bottom and hem.
I love when people share their finished pieces. If you share your work on facebook or instagram, please tag me so I can see it @shemakescrochet.
You are free to share your finished work, to include selling your finished products, but please credit me – SheMakesCrochet – as the pattern designer. Please do not distribute this pattern or any portion of it, instead direct people to my blog. THANK YOU!


1 thought on “Rag Doll”