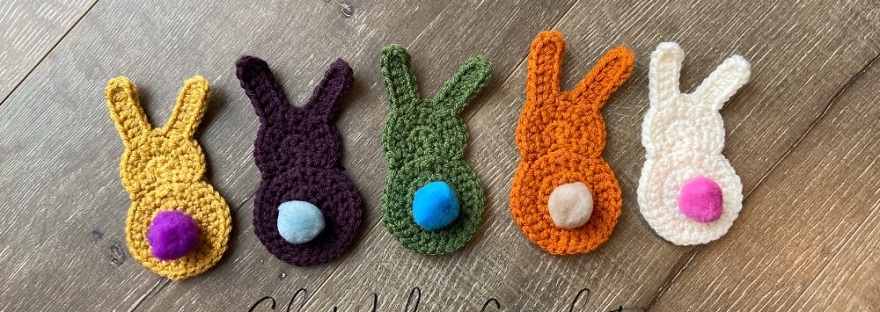
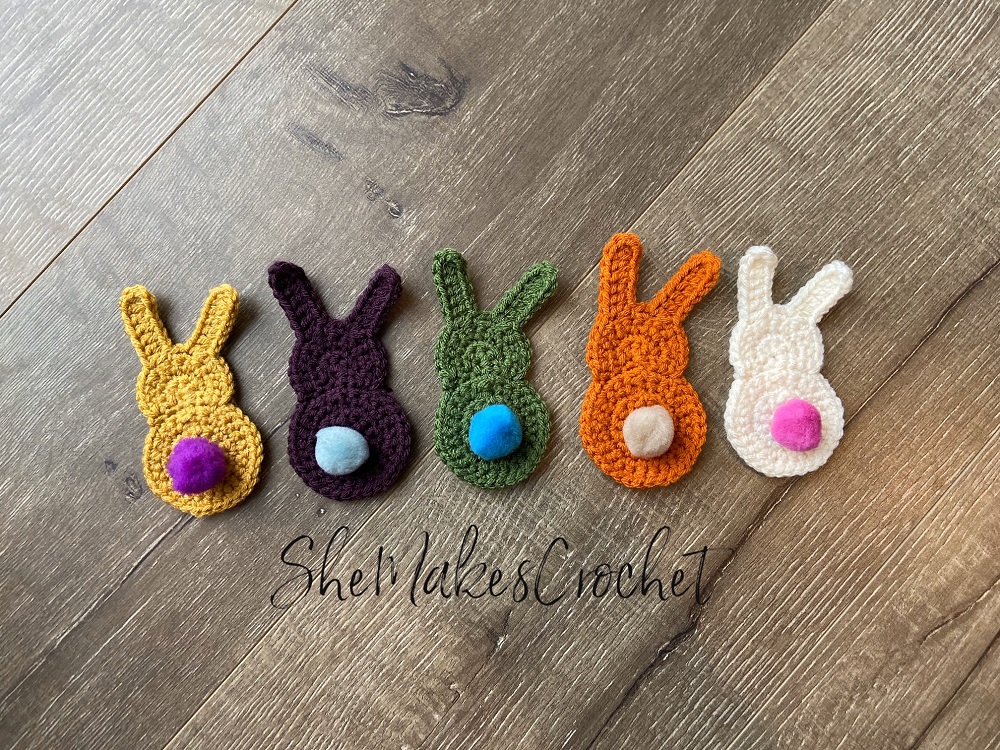
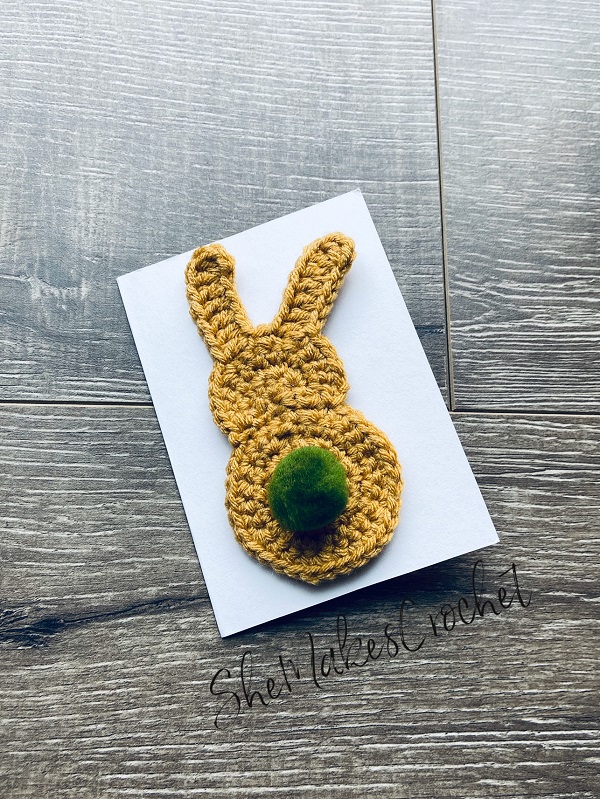
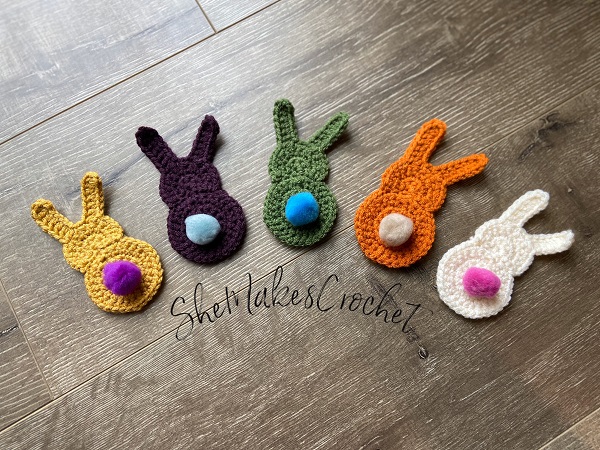
Are these not the most adorable little bunnies ever!? After that pom-pom tail on my bunny candygram (which you can find here if you haven’t seen it), I knew I needed to do something similar for spring/Easter. I just love the simple silhouette of the bunny and then that fun pop of color and texture from the pom-pom. It’s a perfect match and so fun to play with colors. See what I mean?

These are such a quick project. You can use whatever yarn you have in your stash and they are worked as one piece!
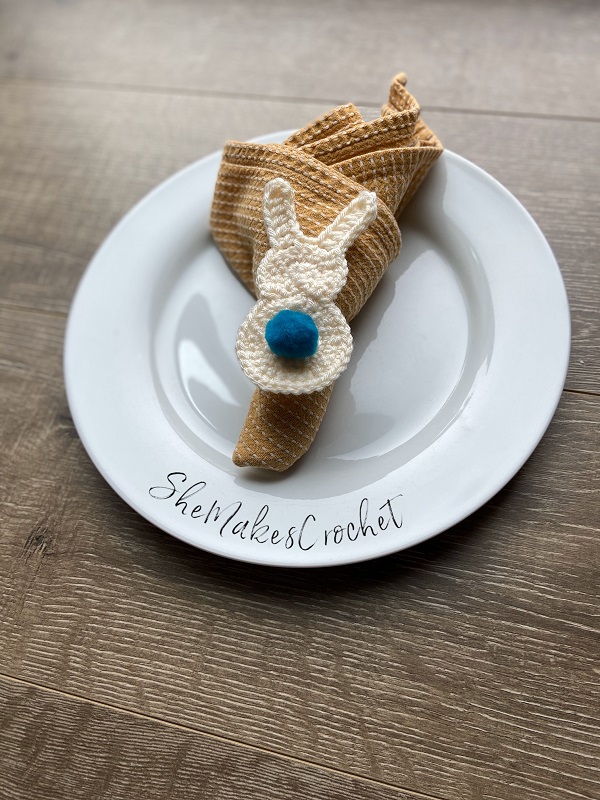
I think these bunnies would make adorable napkin rings. If you have some napkin rings lying around that you don’t mind repurposing, you could just glue them right on! If not, you could attach a ribbon or a strand of single crochet to tie around a napkin. I attached mine with twine.
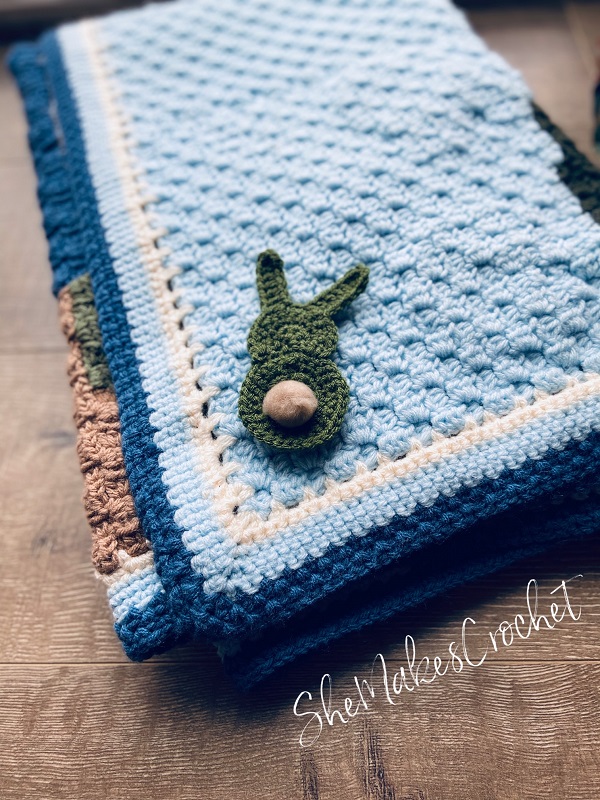
I also think these would be super cute glued to a card or attached to some card stock and then placed in a rustic frame to display on a shelf. You could also use it like an applique and sew it down to a blanket or children’s scarf or sweater.
Finally, I just finished a beautiful project using these appliques and my carrots (that you can find here). I’m so excited to share this one with you guys! It’s playful and farmhouse rolled into one. It’s seriously so adorable. I’ll be posting the details for that in a quick post coming up soon.
Bunny Tail Applique
Supplies:
- Worsted weight yarn – I used Yarn Bee Soft & Sleek in a variety of colors
- 4.0 mm crochet hook
- Scissors
- Needle for sewing down yarn tails
- Pom-poms in contrasting colors
- Glue – I used hot glue
Finished Dimensions: My bunnies are approximately 4.5 inches tall.
Abbreviations and stiches used:
- CH chain
- SC single crochet
- INC increase (i.e. work 2 SC into one stitch)
- DC double crochet
- SS slip stitch
Pattern:
- Round 1: Magic ring, SC 6, SS to join to first SC, CH 1 and turn. Pull ring tight. (6 SC)
- Round 2: INC in each stitch around, SS to join to first SC, CH 1 and turn. (12 SC)
- Round 3: *SC, INC. Repeat from * five more times. SS to join to first SC, CH 1 and turn. (18 SC)
- Round 4: *SC, SC, INC. Repeat from * five more times. SS to join to first SC, CH 1 and turn. (24 SC)
- Round 5: *SC, SC, SC, INC. Repeat from * five more times. SS to join to first SC, CH 2, SS to join in the same stitch as previous SS (forming a small loop), CH 1 and turn. (30 SC)
Note: You just created the body. Next, you will be creating the head. While working the head, at the end of each round, you will SS into the body (the circle you just made) to help with the shape. To start each round, you will have to skip the join (from the previous round) and start working your stitches in the head (the stitches you just created in the previous round). See pictures below for further clarification.
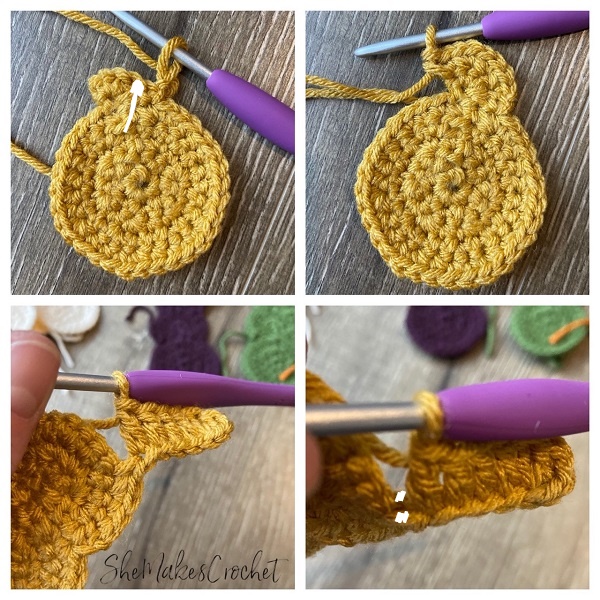
- Round 6: Work 4 SC into the CH 2 loop created in Round 5. Then, SS join into the NEXT stitch of the BODY (i.e. the next stitch from Round 5). CH 1 and turn. (4 SC)
- Round 7: INC into each stitch of the head i.e. the four stitches created in Round 6. SS join into the next stitch of the body, CH 1 and turn. (8 SC)
- Round 8: (skip the join) *SC, INC. Repeat from * three more times. SS to join into the next stitch of the body, CH 1 and turn. (12 SC)
- Round 9: (skip the join) SC, SC, INC, SC, [CH 7 and make 2 DC in the third CH from hook, DC in next four CH and DC in side of last SC made – first ear formed], SKIP next stitch, INC, SC, [CH 7 and make 2 DC in third CH from hook, DC in next four CH and DC in side of last SC made – second ear formed], SKIP next stitch, INC, SC, SC, INC. SS join into the next stitch of the body. Break yarn and weave in ends.
Finishing:
To assemble, place a small dab of glue in the center of the body circle and press a pom-pom into place. That’s it! The easiest project ever!
Keep an eye out for my next update and I’ll show you how I combined these with my carrots. Seriously, it is my absolute favorite way to display these and the carrots, I think you’ll love it.
I love when people share their finished pieces. If you share your work on Facebook or Instagram, please tag me so I can be sure to see it @shemakescrochet.
You are free to share your finished work, to include selling your finished products, but please credit me – SheMakesCrochet – as the pattern designer. Please do not distribute this pattern or any portion of it, instead direct people to my blog. THANK YOU!


Love these little bunny appliques. Can’t wait to add a few of them to an afghan. Thank you for sharing your patterns with us.
Thank you! I think they would be such a fun touch to an afghan. I’m glad you like them.